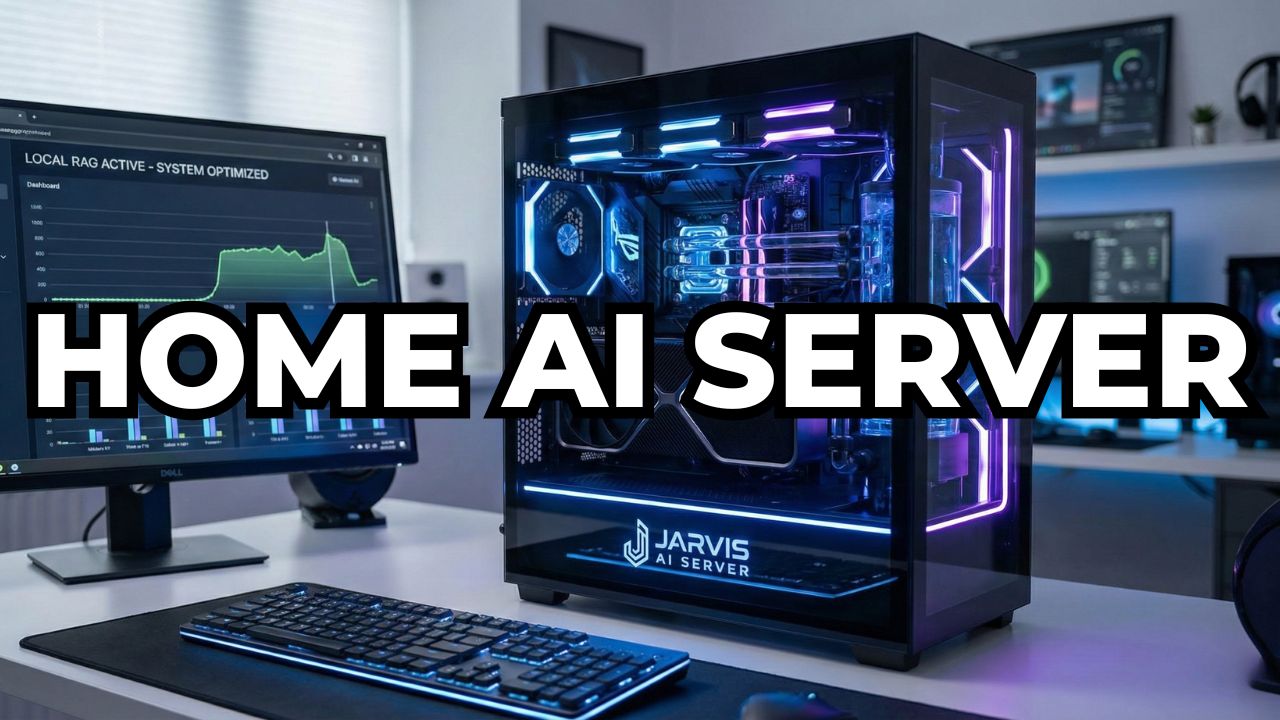
Build Your Own "Jarvis": The Home AI Server Build Guide
For some of us, a laptop isn't enough. We don't just want a smart assistant; we want an oracle.
We want a system that can ingest thousands of PDFs, manage our entire smart home, and generate 4K images, all while completely offline. We want a machine that knows everything about our life, our work, and our data, but tells no one.
This is where the Home AI Server comes in.
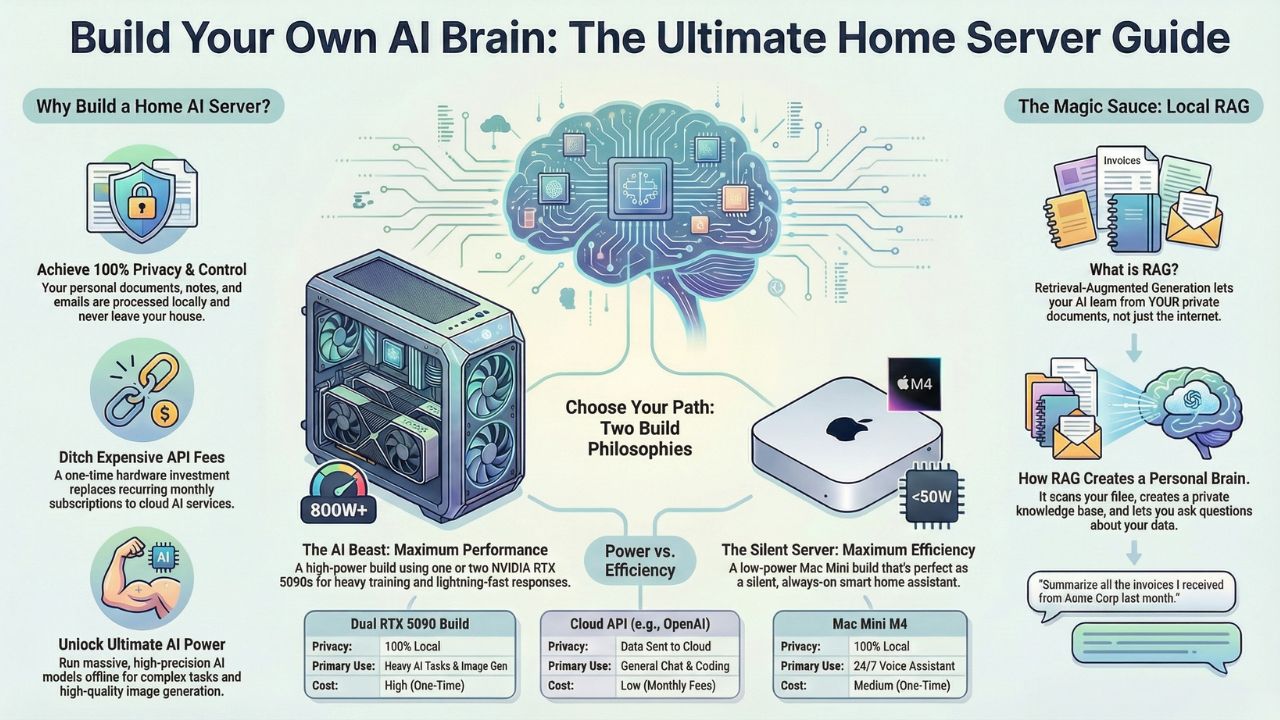
Building a dedicated AI server in 2026 is the ultimate power move. With the release of the NVIDIA RTX 50-series (5090 and 5080), the consumer market finally has access to the kind of compute that used to be reserved for enterprise data centers.
This guide isn't about building a gaming rig. It's about building a "Local RAG" (Retrieval-Augmented Generation) system, your personal "Jarvis." Here is how to cut the cord and build your own intelligence infrastructure.
Explore The AI PC & Hardware Hub
Part 1: The Hardware – Anatomy of an AI Beast
When planning a home AI server build 2026, you have to unlearn what you know about gaming PCs. In gaming, you pay for high clock speeds and RGB lighting. In AI, you pay for two things: VRAM (Video Memory) and Memory Bandwidth.
1. The GPU: The Engine of Intelligence
The GPU is the heart of your server. It determines "how smart" a model you can run.
The King (RTX 5090): In 2026, the NVIDIA RTX 5090 is the gold standard. With its massive VRAM buffer (rumored 32GB+), it allows you to load "unquantized" (full precision) models entirely into memory. This means your AI doesn't "hallucinate" as often and understands complex logic better.
The Multi-GPU Strategy: For advanced users, we are seeing a massive shift toward the RTX 5090 dual GPU setup for LLM. By linking two cards, you don't just get faster speeds; you double your memory pool. This is the only way to run massive 70B+ parameter models (like Llama-3-70B or Falcon-180B) at lightning speeds without spending $30,000 on enterprise cards.
2. The Motherboard: The Highway
This is where most first-time builders fail. You cannot just buy any motherboard. You need the best motherboard for multi-GPU AI build.
PCIe Lanes Matter: Standard consumer boards often "choke" the second GPU, running it at slow speeds (x4 lanes). You need a board (often E-ATX or Workstation class like Threadripper or Xeon) that supports x8/x8 bifurcation or full x16/x16 speeds.
Spacing: If you jam two RTX 5090s together, they will suffocate. Look for motherboards with wide spacing (3-4 slots apart) between the main PCIe slots.
3. RAM & CPU: The Bottleneck Breakers
System RAM: AI is data-hungry. 32GB is not enough. For a server that handles RAG (reading your documents), the index lives in your RAM. We recommend 128GB of DDR5 RAM as the new standard for serious builds.
The CPU: Surprisingly, you don't need a flagship CPU. AI inference is 90% GPU-bound. A modern mid-range chip (like an AMD Ryzen 7 or Intel Core i5) is sufficient to "feed" the GPUs. Save your money here and spend it on more VRAM.
4. Cooling Solutions
Gamers play for a few hours. AI servers run 24/7. If you are re-indexing your documents or generating a dataset overnight, your GPU will run at 100% load for 12 hours straight.
The Danger: Standard "open air" coolers dump heat inside your case.
The Solution: We recommend cooling solutions for AI workstations that involve "blower-style" GPUs (which push heat out the back) or, ideally, a custom liquid cooling loop. If you stick with air, you need a high-airflow case (like the Fractal Torrent) to force cool air over those backplates.
Part 2: The "Apple" Alternative – The Silent Server
Not everyone wants a loud, power-hungry tower in their living room. If you prioritize silence and efficiency over raw horsepower, there is another path. Consider the mac mini m4 pro as home server.
Why it works: Apple’s Unified Memory allows the CPU and GPU to share the same RAM pool. A Mac Mini with 64GB or 128GB of RAM can load huge models that even an RTX 5090 can't touch.
The Trade-off: It is slower (lower tokens per second) than NVIDIA, but it draws 1/10th the power. It is the perfect "always-on" solution for a home voice assistant that controls your lights and answers basic questions.
Part 3: The Comparison – What Should You Build?
| Feature | Dual RTX 5090 Build | Mac Mini M4 Pro/Max | Cloud API (OpenAI/Claude) |
|---|---|---|---|
| Primary Use | Heavy Training, Image Gen, Fast Chat | 24/7 Assistant, Long Context, Silence | General Chat, Coding |
| Privacy | 100% Local (Air-gapped) | 100% Local | Data sent to server |
| Cost | High ($3,500+) | Medium ($1,500 - $3,000) | Monthly Fees ($20/mo+) |
| Speed | Extreme (100+ tokens/sec) | Moderate (30-50 tokens/sec) | Variable (Latency) |
| Power Draw | High (800W+) | Low (<50W) | N/A |
Part 4: The Software – Giving It a Brain
Hardware is just metal without software. To turn this pile of parts into "Jarvis," you need the right stack.
1. The OS: Ubuntu Server
Windows is okay, but for a true server, Linux is king. It has less overhead, meaning more RAM for your AI.
2. The Engine: Ollama
The ollama server hardware guide is simple: install Ollama. It acts as the backend "driver" that makes downloading and running models (like Llama 4, Mistral, or Phi-4) as easy as typing one command.
3. The Brain: Local RAG (Retrieval-Augmented Generation)
This is the magic sauce. Building a local rag server involves installing a UI like Open WebUI or PrivateGPT.
How it works: You point the software to your "My Documents" folder. It scans your PDFs, Notes, and Emails, creating a vector database.
The Result: You can ask, "Jarvis, summarize all the invoices I received last week", and it answers instantly based on your real data, without a single byte leaving your house.
Step-by-Step: The Build Guide
To help you get started, here is the high-level workflow for your build.
Estimated Cost: $2,000 - $4,500
Time Required: 4-6 Hours
- Select Your Case: Choose a "Full Tower" case with maximum airflow (e.g., Fractal Torrent or Corsair 7000D).
- Install the CPU & RAM: Populate all DIMM slots to reach 128GB. Tip: Buy a matched kit of 4 sticks to ensure stability.
- Mount the GPU(s): If using an RTX 5090 dual GPU setup, ensure you have a power supply (PSU) of at least 1600W to handle transient power spikes.
- Install the OS: We recommend Ubuntu Server 24.04 LTS for maximum stability.
- Deploy the Stack: Install Docker and pull the Ollama container.
- Ingest Data: Point your RAG software to your "Documents" folder and let it index overnight.
Frequently Asked Questions (FAQ)
Yes! The RTX 3090 (24GB VRAM) is still the best budget value for AI. Two used 3090s linked via NVLink can actually outperform a single 4090 in memory capacity for a fraction of the price. It's a legendary card for self-hosted ai assistant hardware.
Not necessarily "AI" branded, but you need a "Workstation" class board if you plan to run more than one GPU. Look for "SLI Support" or "Bifurcation" in the manual.
RAG stands for Retrieval-Augmented Generation. Without RAG, your AI only knows what it was trained on (public internet data). With RAG, it knows your data. It’s the difference between a generic chatbot and a personal assistant.